Wordで目次作成のカスタマイズ覚書
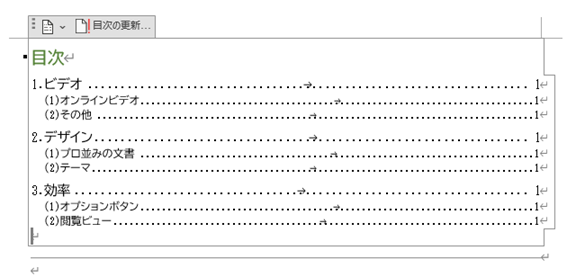
1.本文に見出しレベルを設定しておきます。
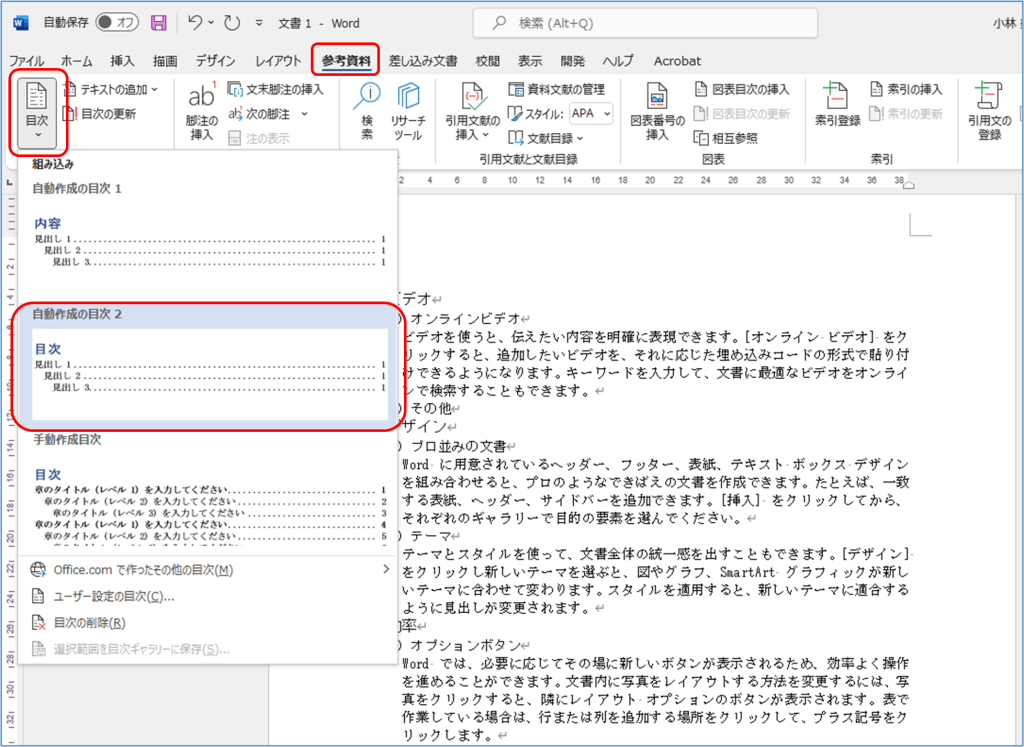
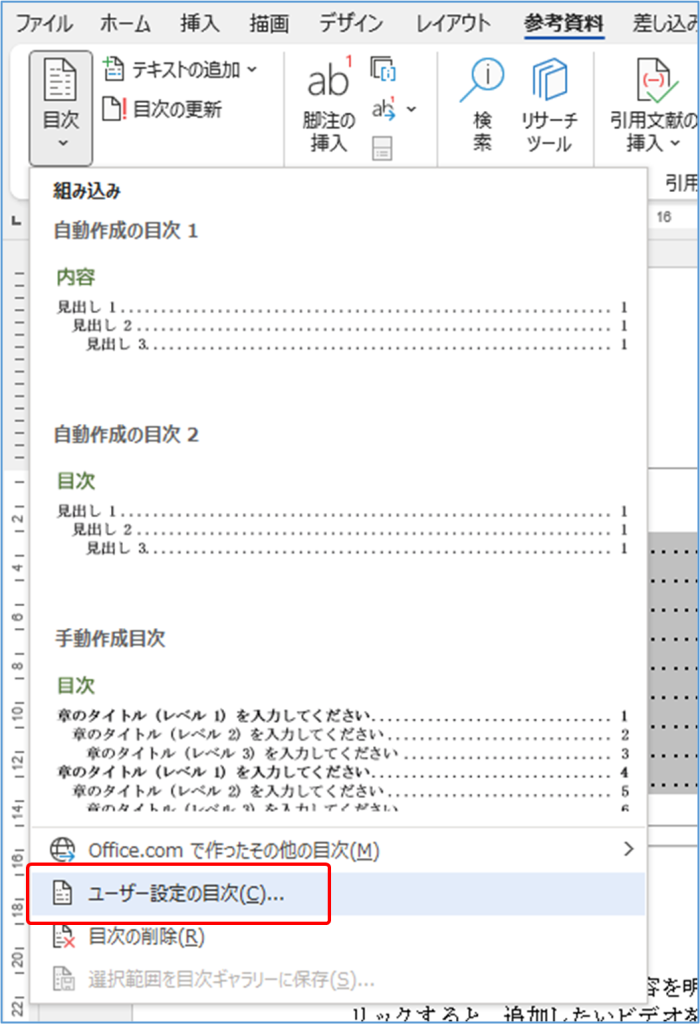
2.<参考資料>タブ→<目次>→今回は組み込みの「自動作成の目次2」をクリック。
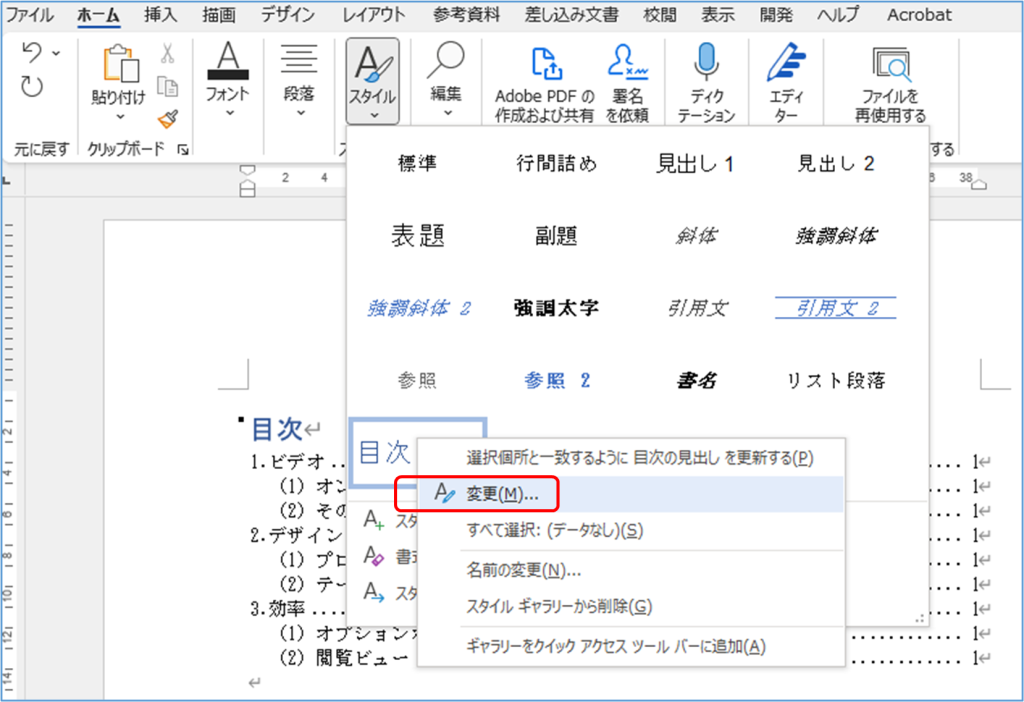
3.タイトル「目次」の書式を変更。
①「目次」文字列をクリック。

②<ホーム>タブ→<スタイル>グループ→「その他のスタイル」から、「目次の見出し」を右クリック。
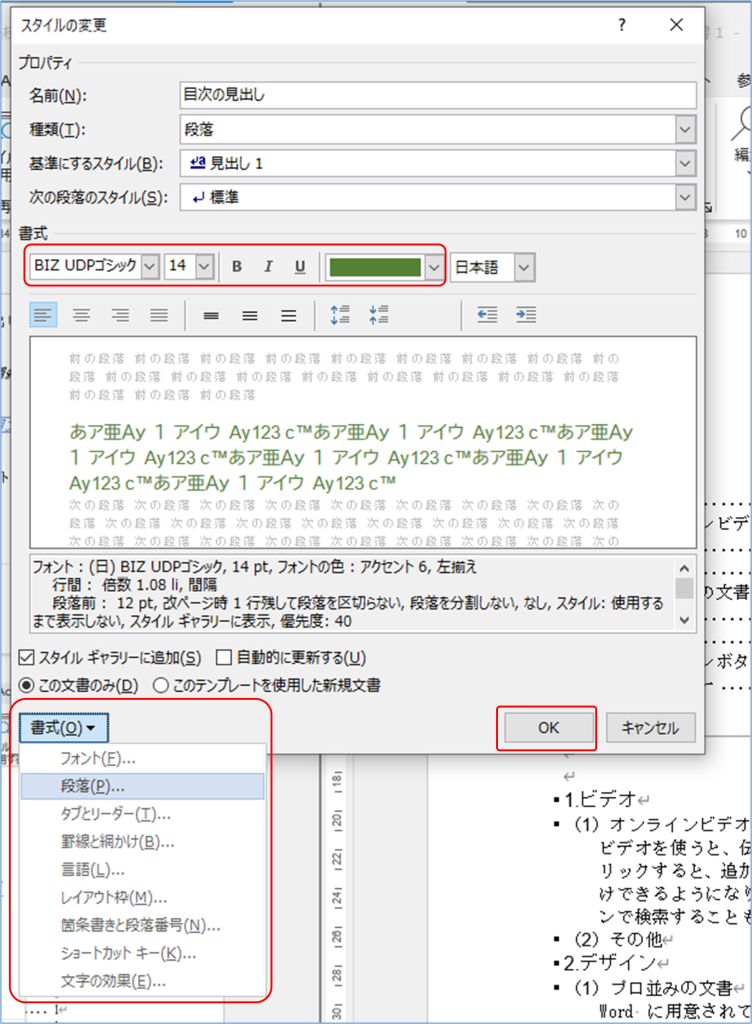
③「変更」をクリック。
④フォントや段落等を適宜変更
4.目次本体の書式変更
①目次内をクリック。

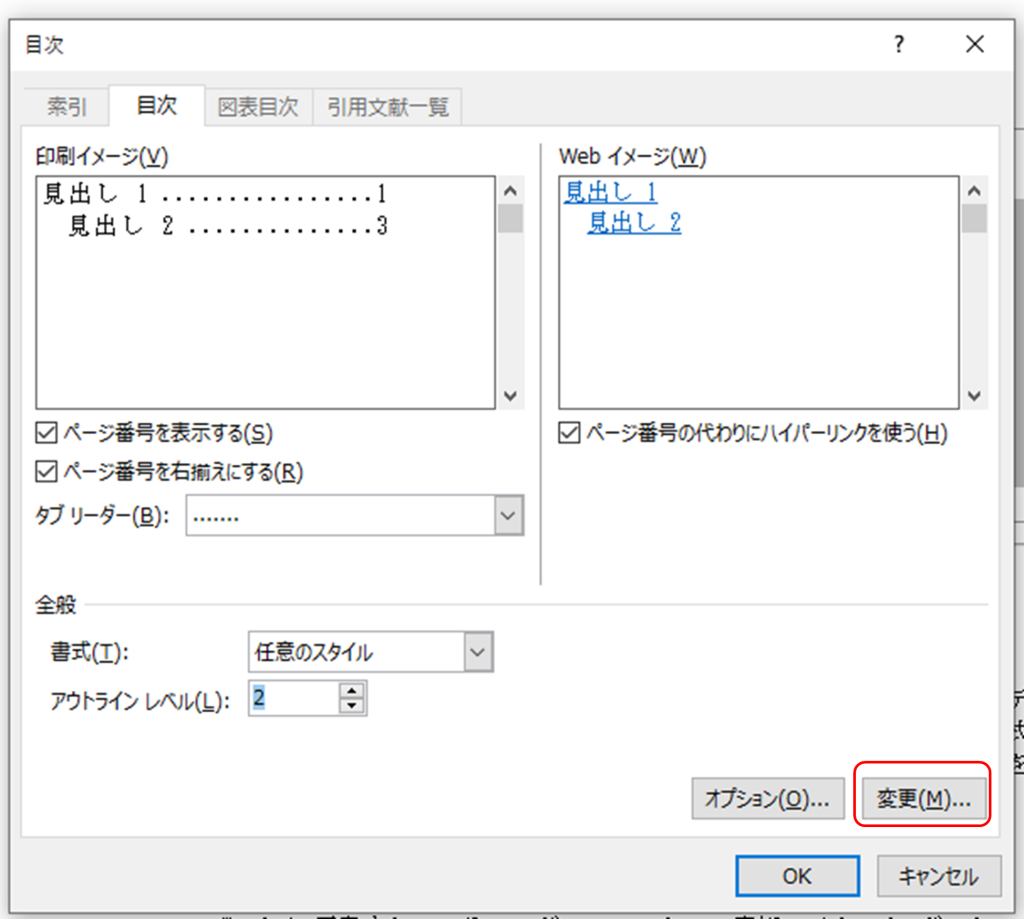
②<参考資料>→<目次>→「ユーザー設定の目次」をクリック。
③「目次」タブで「変更」をクリック。
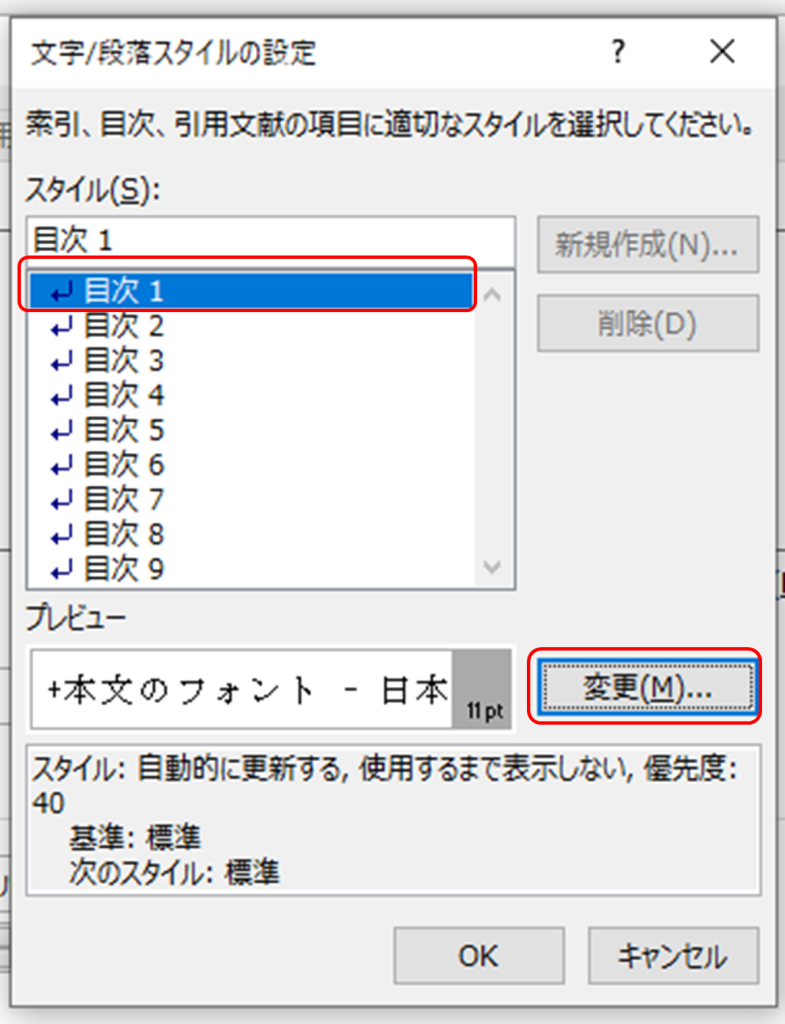
④「目次1」→「変更」の順にクリック
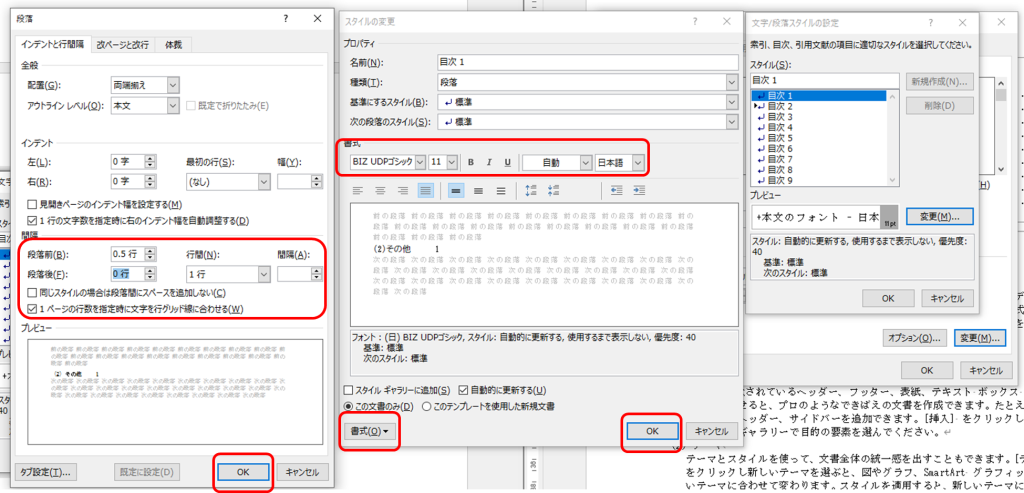
⑤文字書式、段落書式等適宜変更
⑥同様に見出し2以下も適宜書式変更。
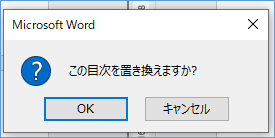
⑦すべて「OK」をクリックし、次のようなメッセージで「OK」をクリック。
⑧目次のカスタマイズ完了。